The Waxup module is here! ...and is guaranteed to impress.
- Blenderfordental

- Nov 17, 2020
- 3 min read
The latest Blenderfordental WaxUp module boasts some incredible features, and truly makes Blenderfordental stand out from its competitors.
Blenderfordental's modules are finding a new home on many Exocad and 3Shape computers. Being able to partake in digital dentistry, without the massive price tag and the lengthy contracts, offers a refreshing sense of freedom.
Blender also allows for file sharing without a communication software subscription & if you want to animate and work directly with the mesh, Blender leaves MeshMixer in it's dust!

The WaxUp module is built on a strong foundation of two other modules - the Model Designer and the Articulator module. You will need a working knowledge of both of these to use the WaxUp module.
Since the release of the Model Designer module, we have had many requests to develop a module for creating diagnostic waxups and temporary crowns. This is not surprising considering the speed of printers currently available. After all, wouldn't it be nice to have temporary crowns printed before the patient arrives.
Our amazing users have helped shape the WaxUp module. We were asked to add many different features, like adding gum to teeth. One project led to another and we were determined to include as many features as we could.
As a result, the WaxUp module has become a stepping stone for both crown & bridge work and for denture work - which will be the next two modules we develop.
The WaxUp module pretty much takes out all the guess work for smile design.
You'll be able to use the RED proportion's template ( ref. Dr. Daniel Ward ), or an orthodontic arch template to align the teeth into a perfect smile.
The module will teach you how to use a novel axis tool to find the correct angle of tilt for a particular tooth. This mathematical approach, with an ability to mirror image teeth, will achieve an absolute symmetry.


Selection of teeth from a tooth library is easy. Just import several libraries into the 3D space, then take your pick. The teeth will virtually snap into the correct position.

Tooth libraries are fully functional. This means the teeth can be turned from an open tooth library into a closed tooth library with the push of a button. The root apex of teeth can be swapped from a flat apex design, to a bullet shaped design or even a ridge-lap design.
You can create thimbles which can be used for other purposes, like tooth retention on a denture, or you may want to add thimbles on an implant frame with cementable crowns.
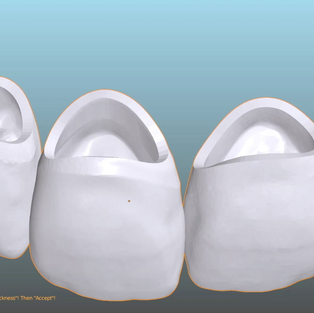
If you like, you can add a wall thickness to a hollow tooth library so it can be 3D printed.
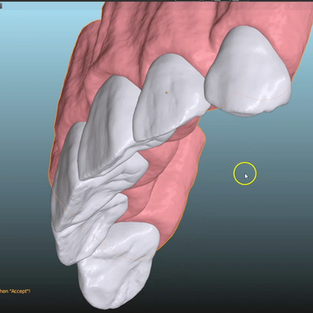
Attaching gum to the cervical part of the tooth, is even more fun and is especially useful for tooth extraction sites, where the addition of a little bit of gum will make the world of difference.
The gum can be manipulated into any direction. The step-by-step tutorials will show you how to work with some of the Blender sculpting tools to create an incredibly natural looking gum effect. You can even texture the gum if you like.
With Blenderfordental's novel 'Sticky Gum' feature you can change the position of the teeth and watch how the gum stretches in real time. Perfect for reposition the teeth for a second try-in.
Heat maps are used for measuring, for example to avoid temporaries from becoming too thin, or to maximise occlusal contact points.
A large part of the module focuses on using the patient's existing teeth for diagnostic waxups. Teeth can be easily taken from the another quadrant, duplicated and mirror imaged to fit perfectly to the other side. These teeth can be saved to build your own tooth library, or you can use them for temporary crowns or bridges
The Waxup module is a great diagnostic tool for treatment planning. It is easy to visualise future tooth reductions and possible gingival recontouring procedures to achieve the best aesthetic outcome.

The Waxup module relies on a working knowledge for Model Designer and the Articulator modules. The Waxup module will guide you step-by-step through a dental veneer case, a full mouth rehabilitation case, as well as an anterior crown with a posterior bridge.
All cases are taken through to the temporary veneers/crowns/bridge stage. These can be 3D printed or CNC milled. While this module is suited for making temporaries, it not recommended for permanent restorations as it does not take into account margin accuracy, blocking out dies, bridge pontics, or internal support structures just to name a few.

The tutorial time comprises around just over two hours. We are certain you'll enjoy Blender's amazing visual effects while working through this module.
You can find the preview video for the WaxUp module in the shop page of the website.
Once again, we thank you for your support.


Comments